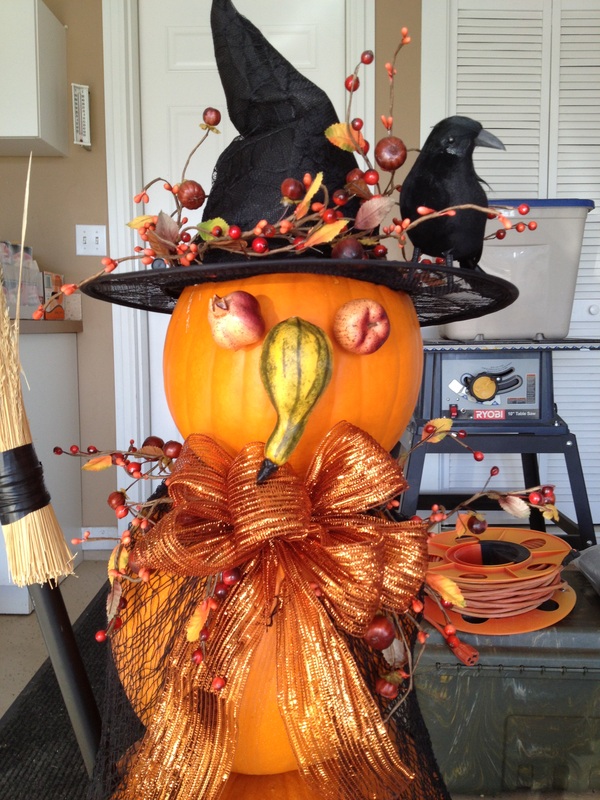
I purchased 3 pumpkins ranging in size at .10 a pound from the local grocery store for $3.68. I also purchased a hat, crow and netting from the dollar store for $3.18. The rest of the items I found from around the house in my box of left over fall decorations. I ran a dowel though all the pumpkins down in to the dirt in the pot of stablize her. I made the broom from the grass plants in my yard and a black pipe with electrical tape wrapped around it. The arms are silk flowers with all the flowers removed just leaving the stems. The nose and eyes are from a fall floral pick. I love her.....
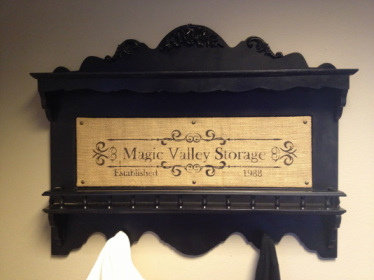
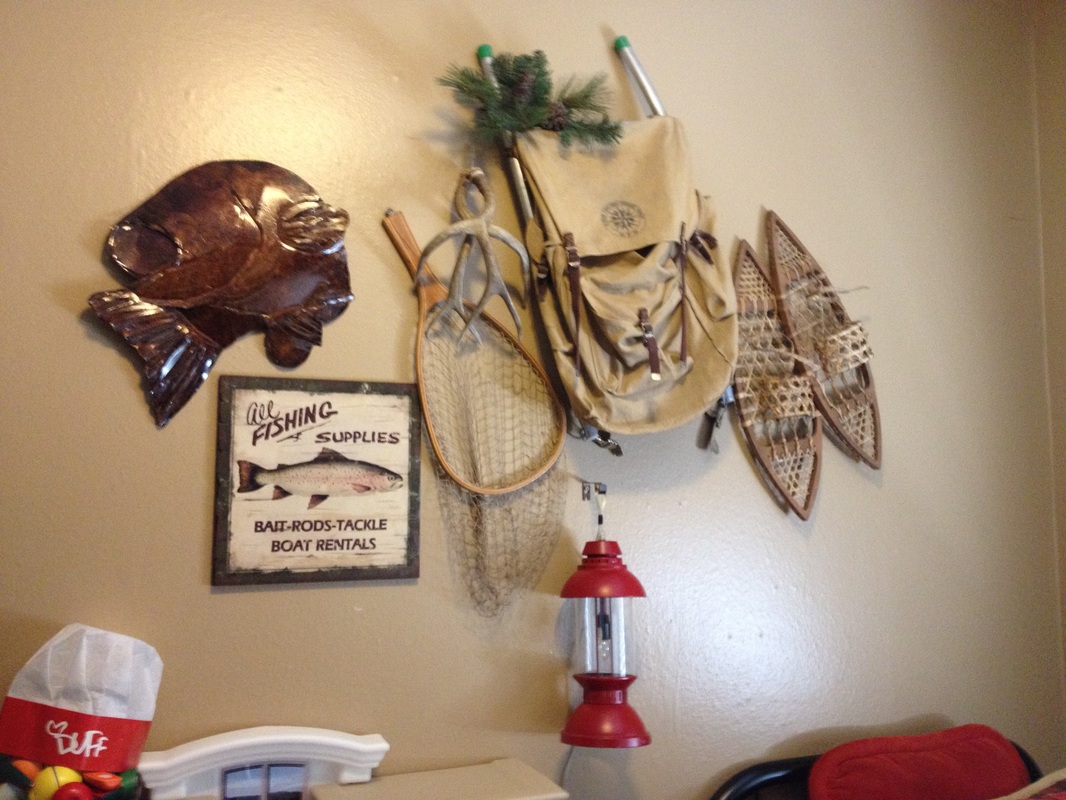
New coat rack for my office. I designed a stencil with the company name and established date and then stenciled it onto burlap. Attached it with decorative thumb tacks. Thank you Pinterest for inspiring me to become creative again!!!
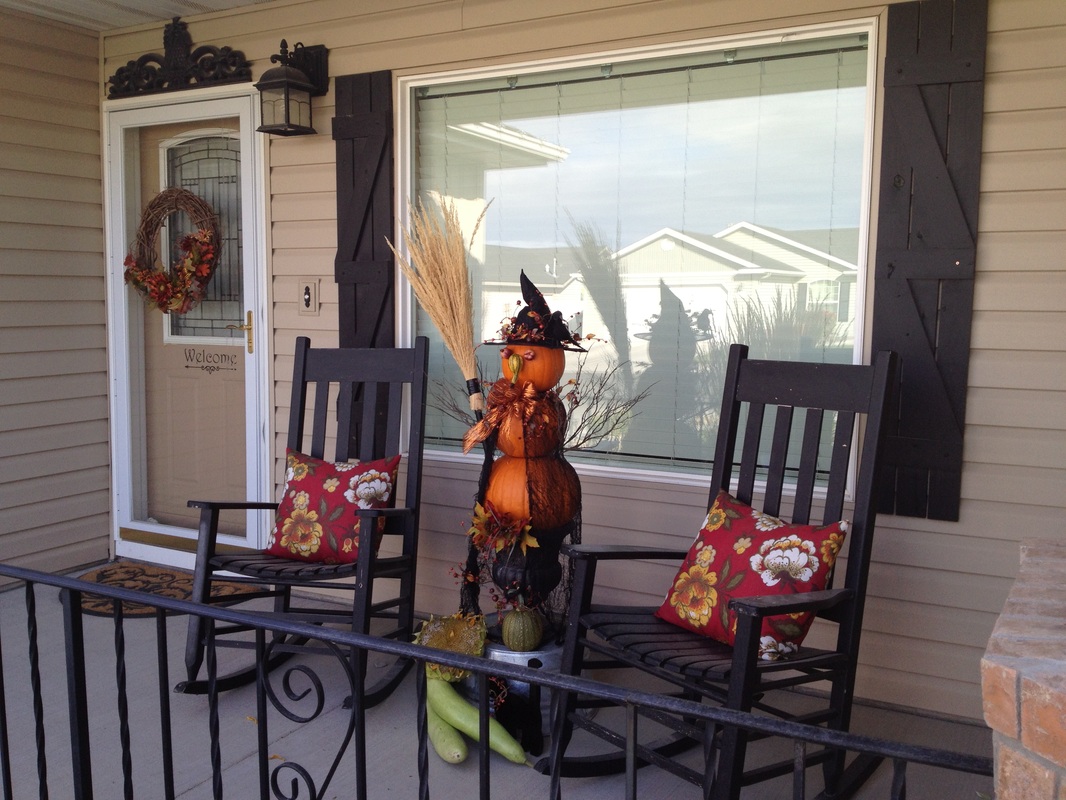
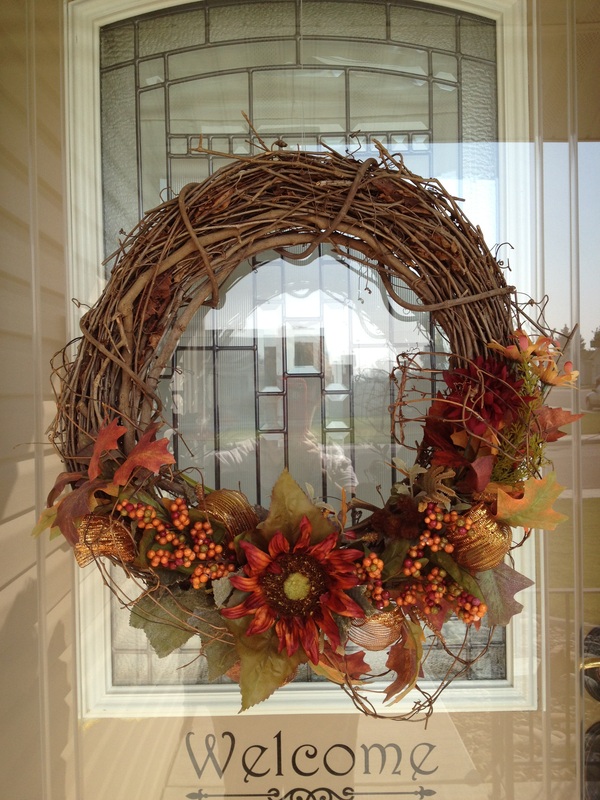
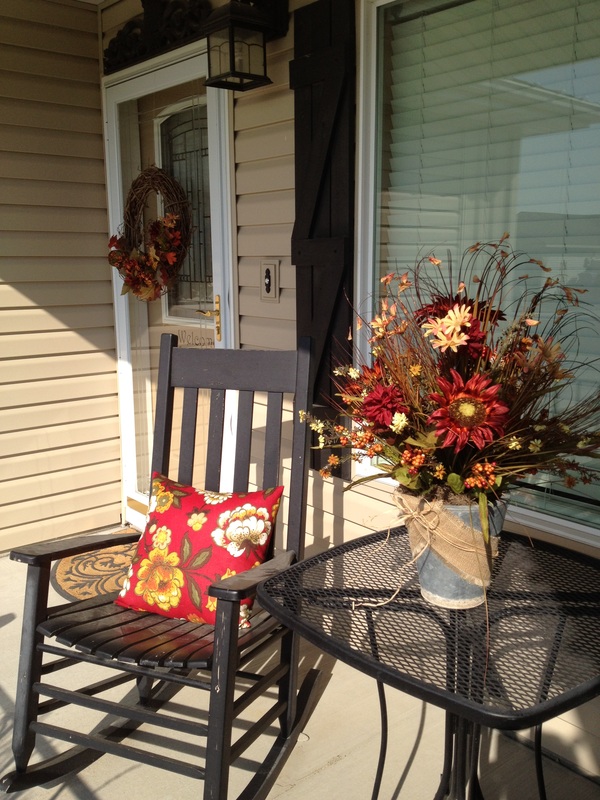
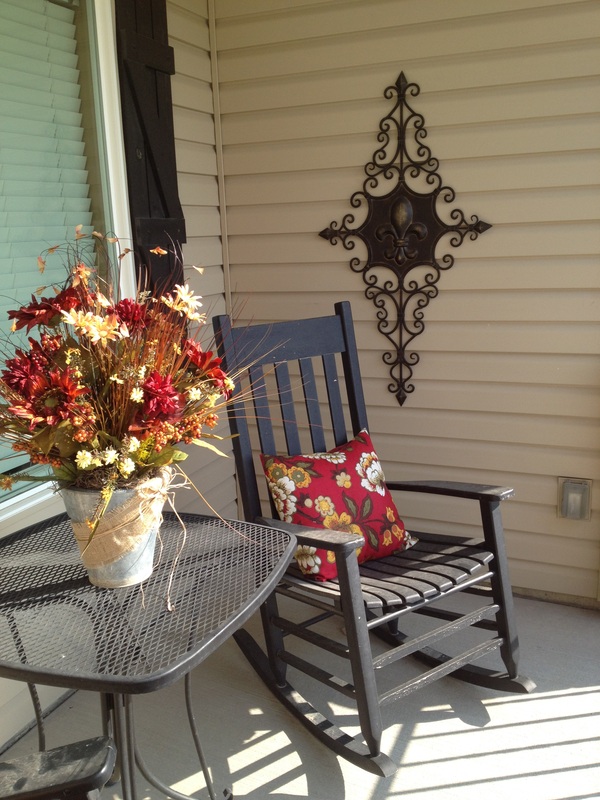
I am ready for fall at my house after updating the wreath with new flowers I made slip covers for the chair pillows out of old drape material I purchased at a yard sale this summer. This summer my pot with silk geraniums was stolen from the front porch....the first thing ever to be stolen from my house in 7 years. So this time I drilled a hole in the pot and bolted it to the top of the table. At least if they want it this time they will have to work at it haha!
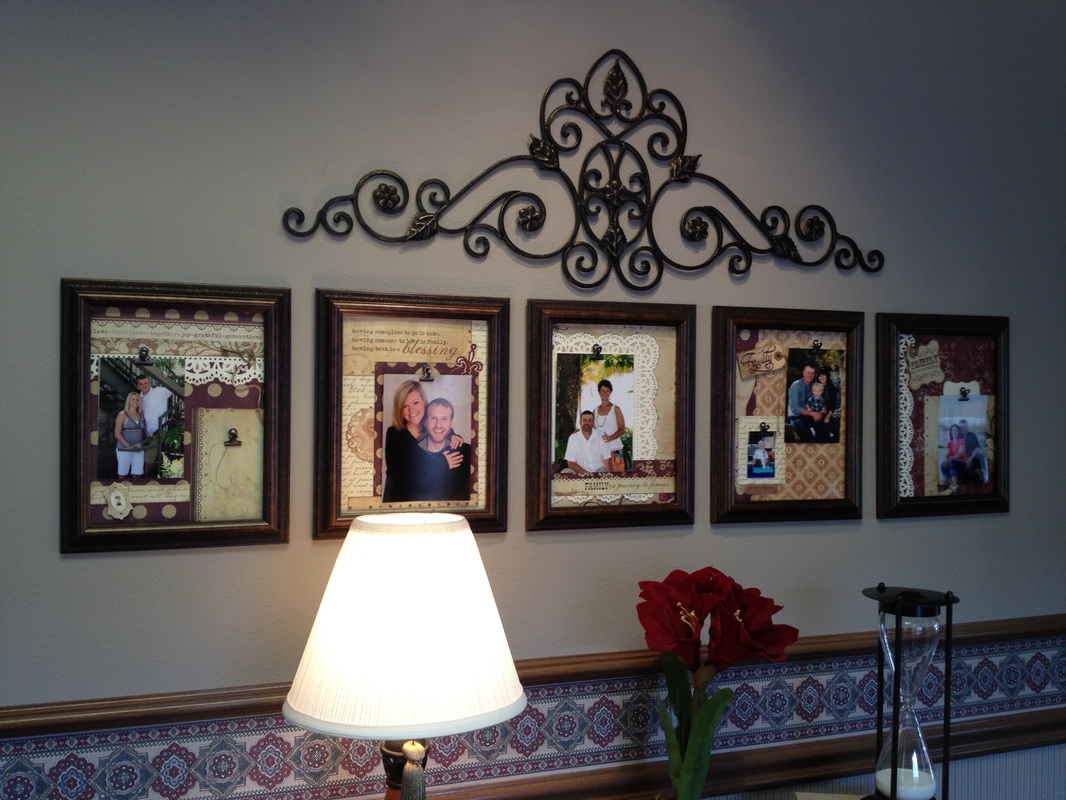
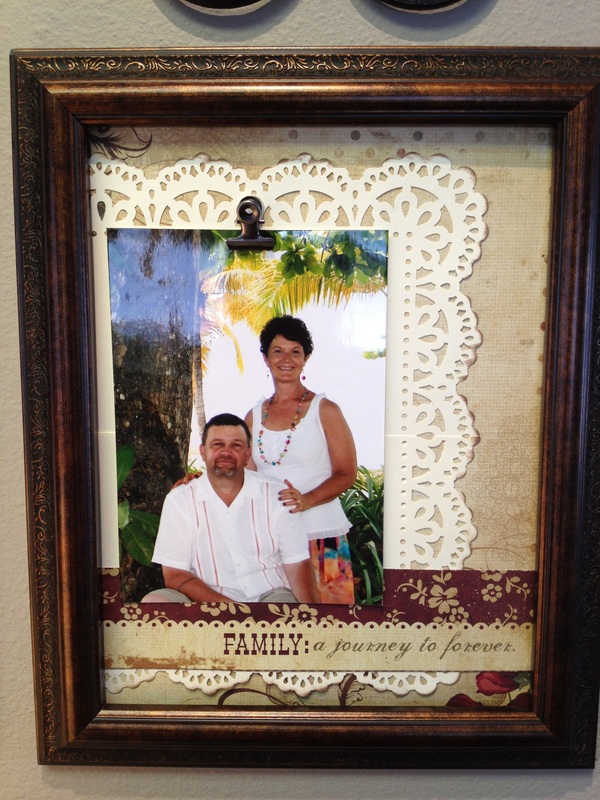
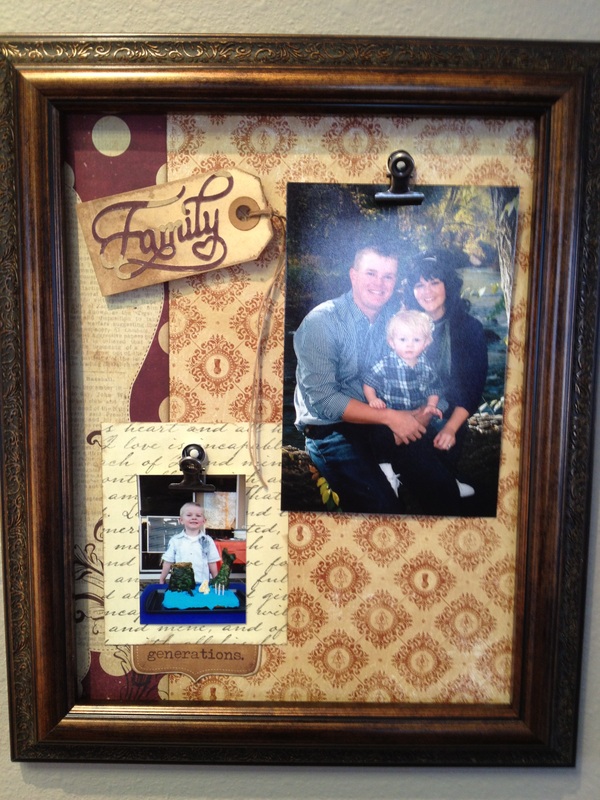
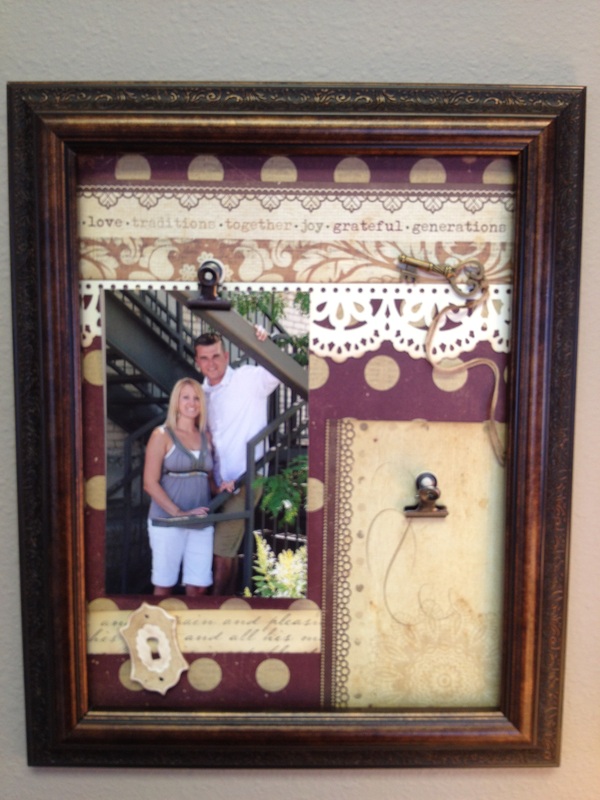
As my children have grown and started their own lives it has become almost impossible to get all the family members together for one family pictures. So my solution to the problem was to create changeable scrapbooking photo mats, so each time I get a new picture of a family I can update my pictures on my office wall very easily by just clipping it on the page. I have designed some of the frames with 2 pictures for each family so as new additions come along I can attach their pictures too.
Inspired by Pinterest again....
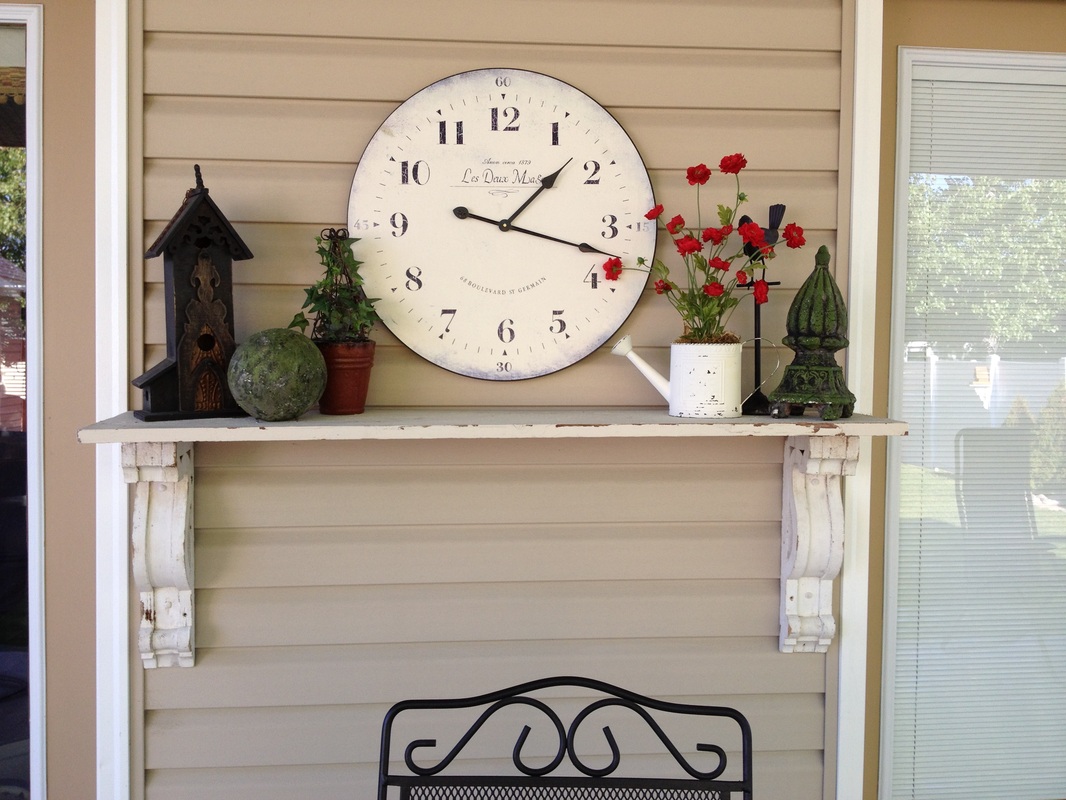
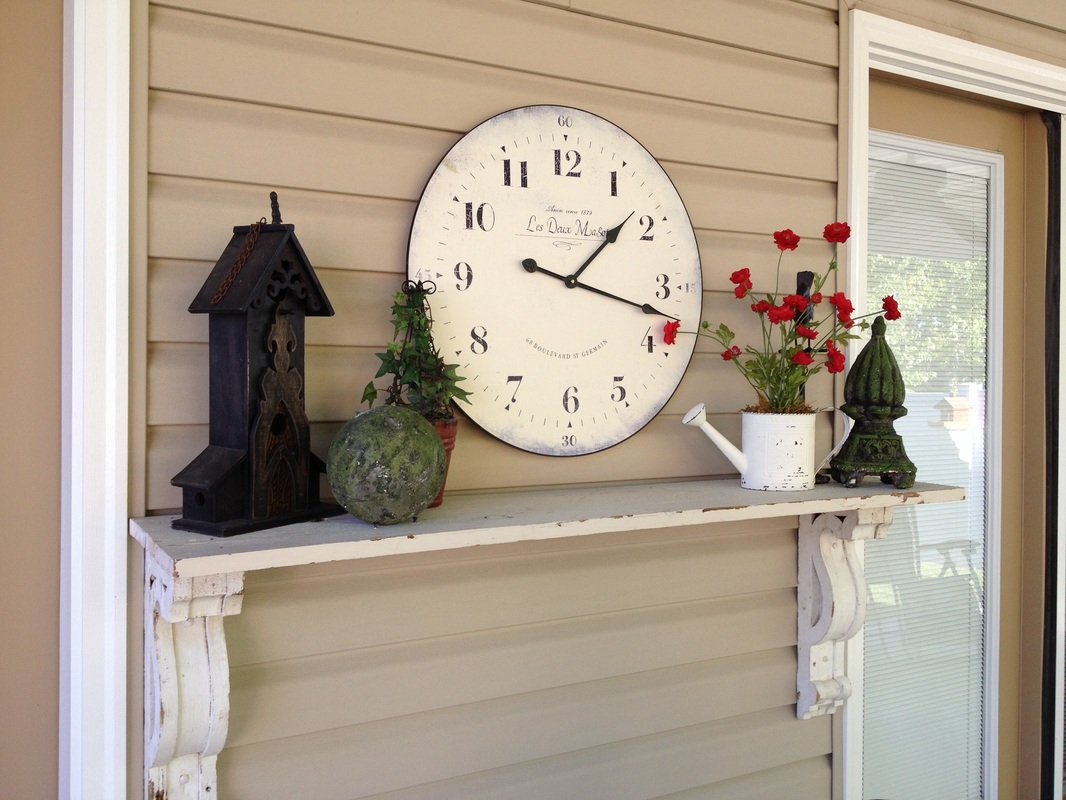
I added a shelf to my back patio. I went to the local Restore
and they gave me an old fence board that was the perfect match to the old corbels
I picked up at a antique store in Missouri a few years ago. I LOVE IT!
This is your new blog post. Click here and start typing, or drag in elements from the top bar.
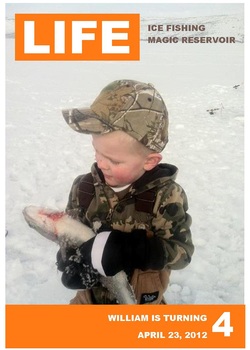
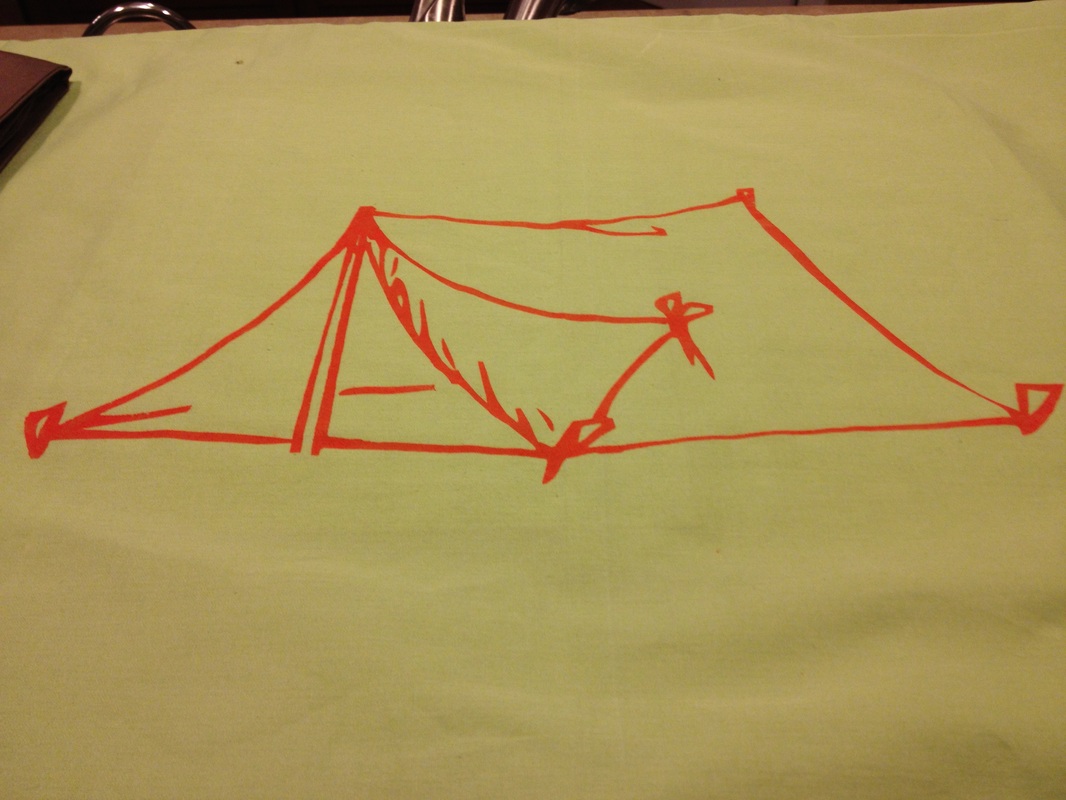
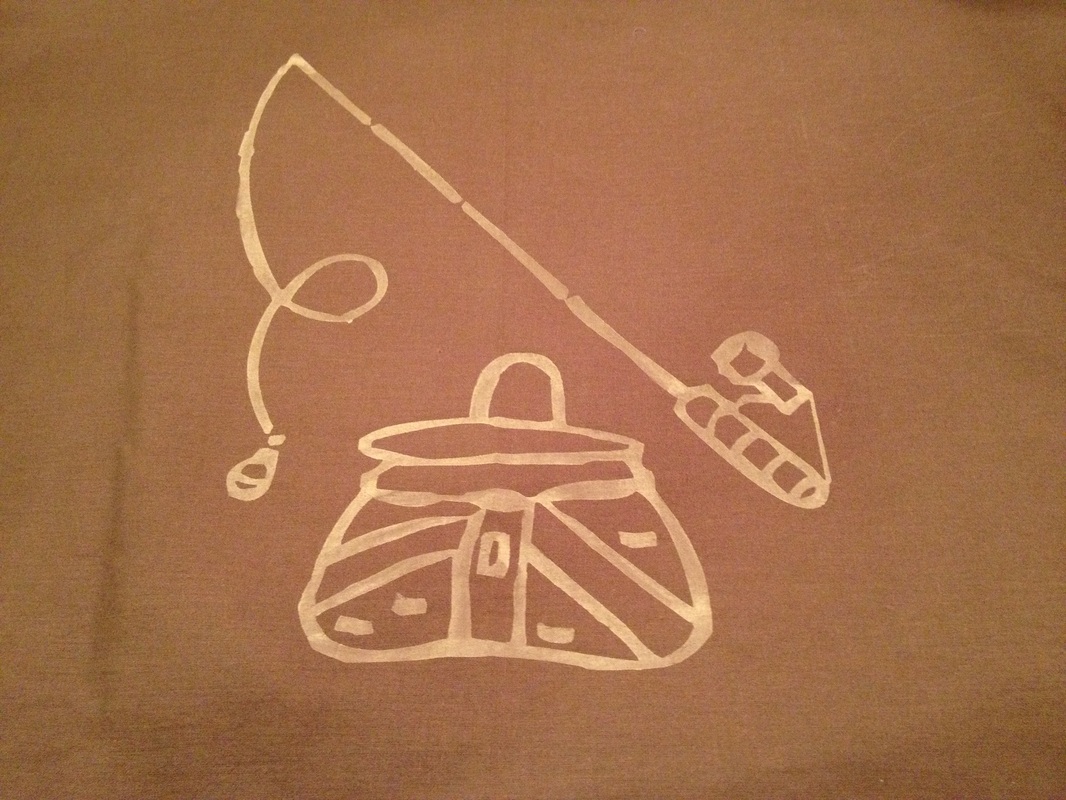
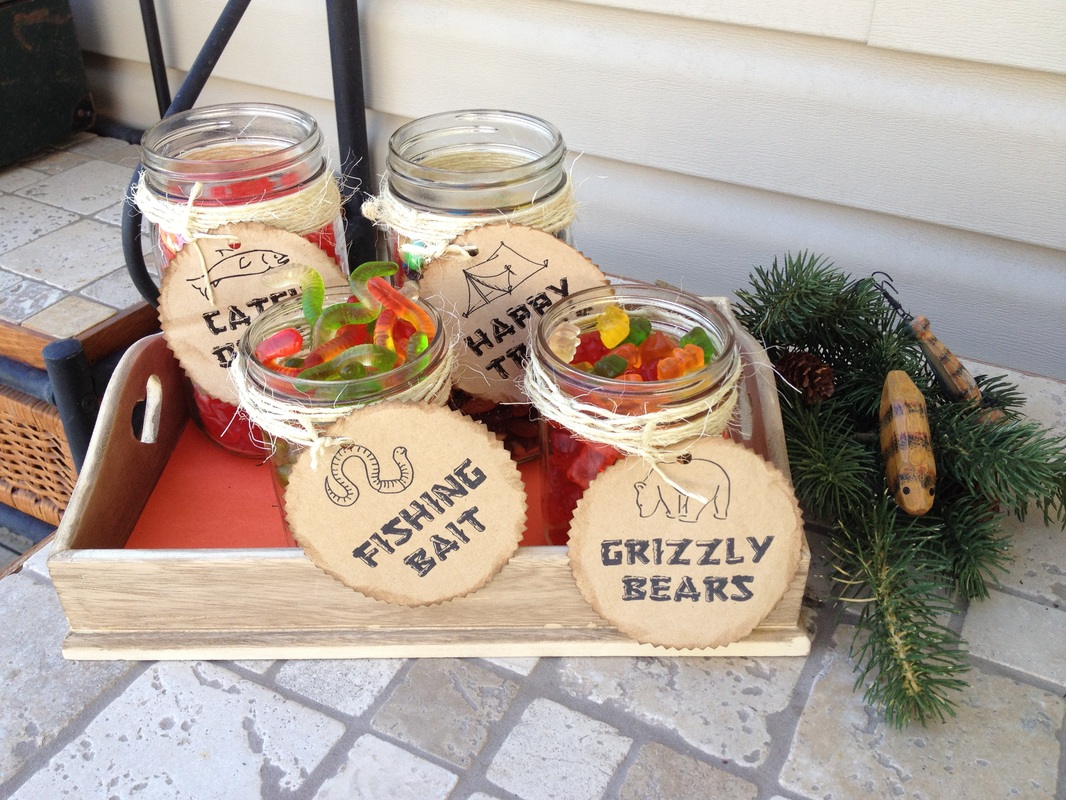
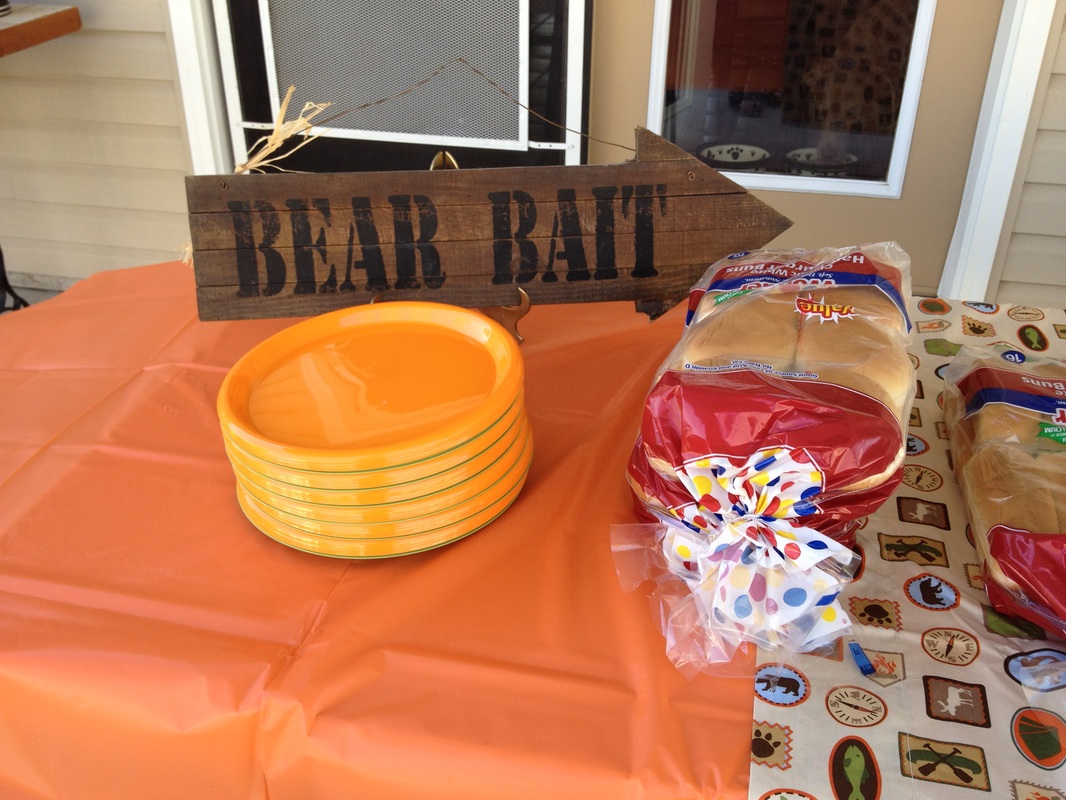
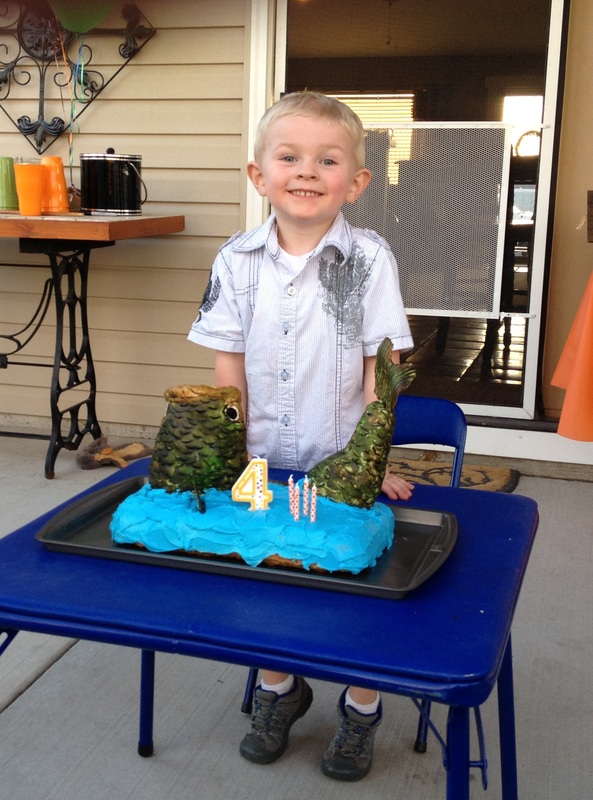
William, my Grandson loves fishing...any stick he finds he imagines it's a fishing pole. So for his 4th Birthday Party, we went with a fishing and camping themed party. This was his Birthday party announcement.
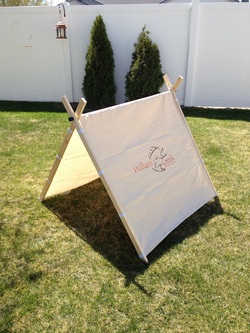
Inspired by Pinterest and
http://grosgrainfabulous.blogspot.com I made a tent for William. I purchased a drop cloth from Harbor Freight for around $6.50 which was enough for the tent and a square table cloth for the card table to go along with the outdoor themed party. I did add additional elastic to the hold the tent on the frame and I also purchased some rubber caps to put on the end so the legs would not fall off.
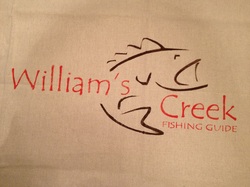
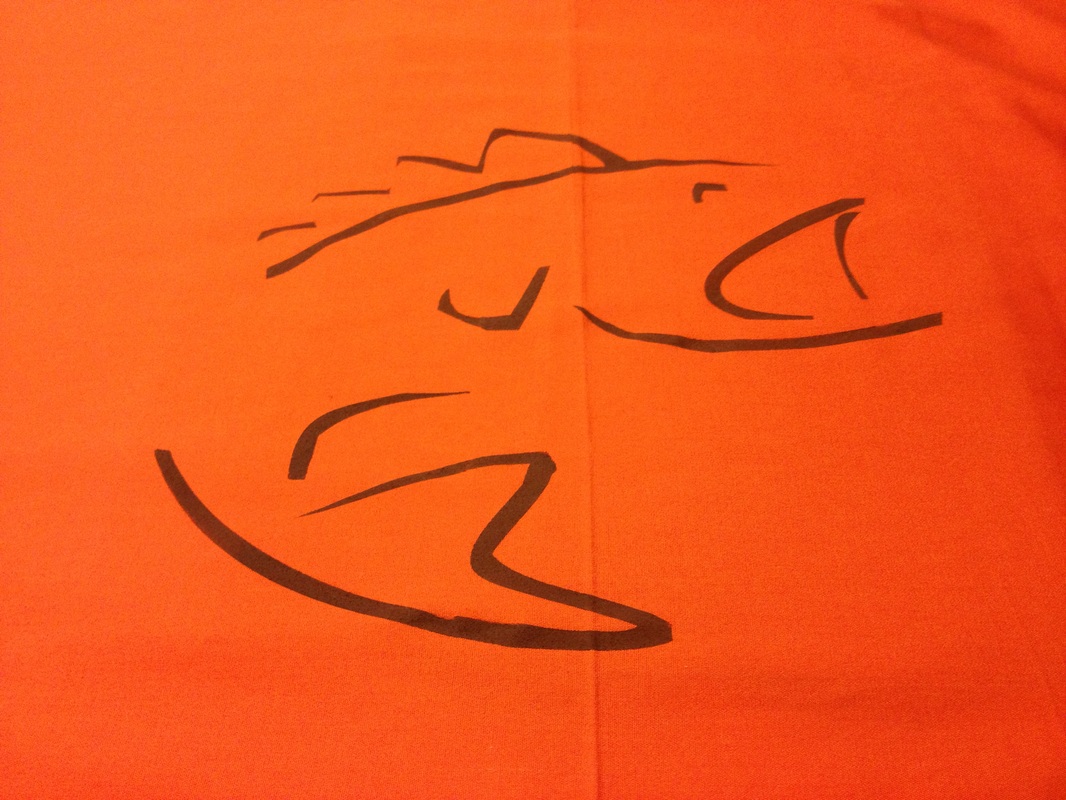
On one side of the tent I designed a logo. Cut it out with my vinyl cutter and used craft paint to paint the image.
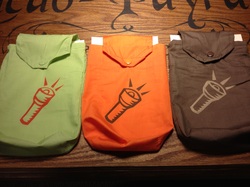
She purchased a twin flat sheet that cost only $5.00 and 4 pillows at $2.50 each, for a total of $10.00. What is so fun about these is the sheet set comes in a small bag so I added a flashlight design to the bags and then we added small flashlight in the bag that we attach to the bedroll with ties.
I also found some outdoor images and added them to the heads of the bedrolls.
For table decorations my daughter used her fishing and outdoor themed room decor along with his bed sheet for the table cloth.
For his gift from his parents we put in his big boy bed and redecorated his room.
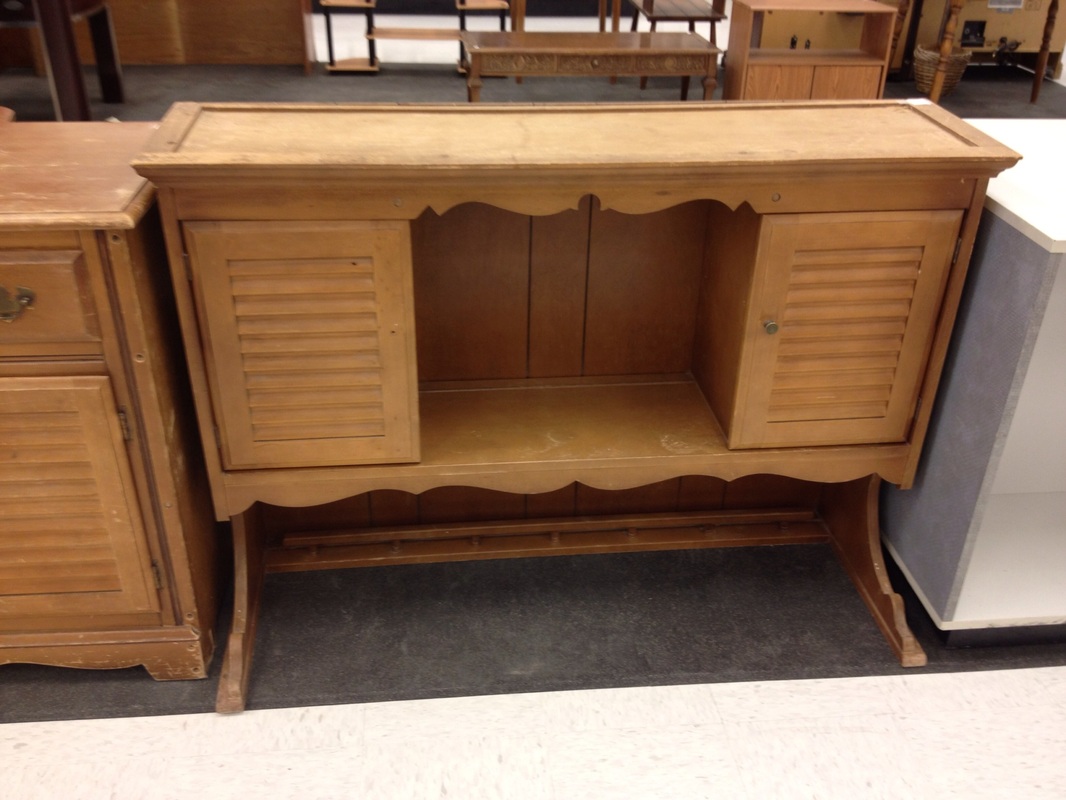
I found a great deal at Deseret Industries on an old China Hutch for $40.00.
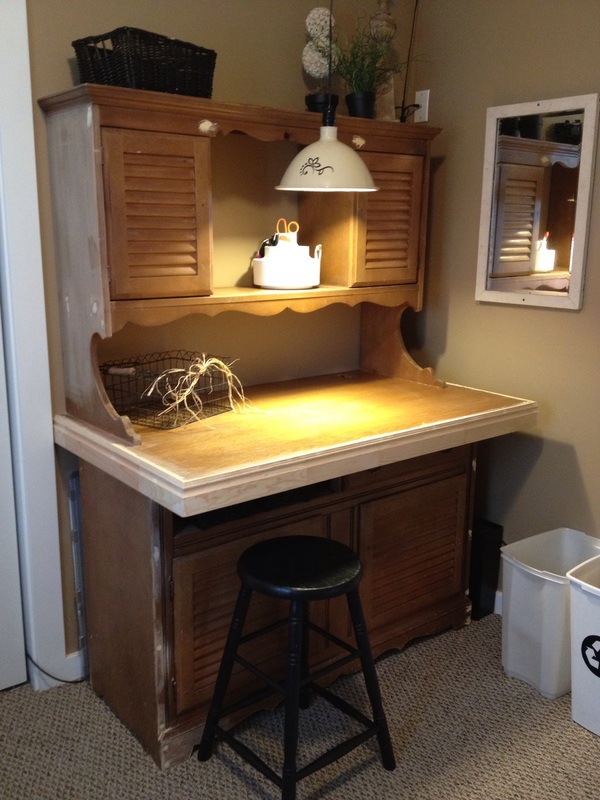
I am going to re purpose it in to additional storage and a new work station in my office for doing my vinyl lettering.
After many hours of thought, I decided to remove the wood paneling from the back and the plate rack
so it wouldn't look so much like a kitchen hutch.
Not wanting too spend to much on the whole project I purchased a door from the local Habitat for Humanity for $10.00 along with some trim for the edges. The hole where the door knob would usually go is perfect for bringing up cords.
I've filled in the holes with wood putty and I am ready to sand and paint.
I sure hope this weekend will be sunny and warm.
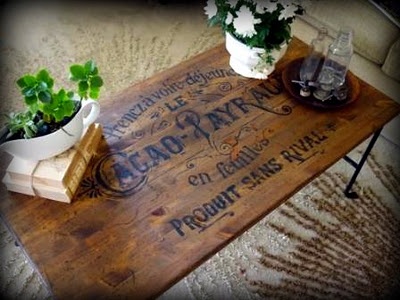
I am going to paint the top and bottom black and then stain the door and trim
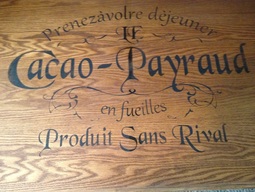
so I can later add some graphics to the top like the table below.
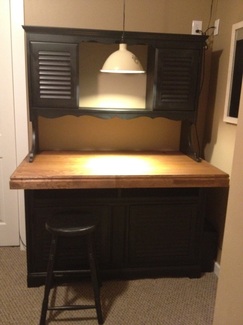
After 5 cans of Semi Flat Black spray paint, a toe injury and 4 hours of on again off again light wind I have a painted desk ready for the graphics to be applied.
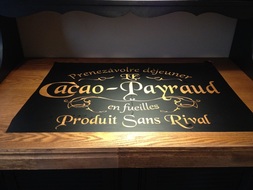
This is my version of the table lettering on the picture above. I did a reverse weeding on the vinyl and applied it to the surface. Then I used black acrylic paint on open areas to get the finished product.
My TV Stand turned Island Project - January 2012
While preparing our last Thanksgiving dinner my husband and I thought it would be really nice to have some extra work space in the kitchen. So I hauled in an old outside sewing machine table I turned in to an outdoor side table for the BBQ. We really liked it and decided that it would be nice to have an island. Well I am a true believer that what you imagine or put out to the universe you will receive. Low and behold about a month later I found my FREE, yes that's right FREE TV stand. I work as the General Manager for a storage facility and the customer told us they emptied the unit completely. Well they didn't but what they left behind was priceless....the starting of my island. Who would of thought that it would be the perfect match to my existing cabinets, how unbelievable!!! So we moved out the sewing machine turned BBQ side table back to the patio and moved in the TV stand. Now the hard part began.....I needed to figure out how to convert it to an island. It sat in my kitchen for probably a month.....it was constantly on my mind, how was I going to raise it 6", cover up the cardboard on the back, and make it all tie together. Then one day I stopped at the local building supply store and I was inspired, black bead board on the sides. I have always wanted to have bead board in my house some where...now I had my chance and I LOVE IT! Next project some baskets, boxes or drawers for where the DVD or VCR player normally would sit....another project began.
The finishing touches to the Island - February 2012
After shopping for weeks for baskets with no success...I turned to a old crate that I found in my Mom and Dad's garage. So I decided to make boxes, painted them black, roughed up the edges with stain to match the cabinet. Then I cut out the lettering on my vinyl cutter and did reverse weeding...leaving just the background. Applied the vinyl to the boxes and with acrylic paint and a dry brush I dabbed on the paint just lightly so it would look aged. Then I applied sticky backed felt to the bottom of the boxes so they would slide in and out easily. Now what to fill them with.....hmm!